Make sure you have the following tools set up on your development machine before starting the process of learning how to build iOS app with Flutter.
Table of Contents
Prerequisites
- Flutter SDK: Download and install the Flutter SDK from the official Flutter website.
- Xcode: Install Xcode from the Mac App Store. Xcode is essential for iOS app development and allows you to build, test, and deploy your Flutter apps on iOS devices and simulators.
- Text Editor/IDE: Choose a text editor or integrated development environment (IDE) of your preference. Popular choices include Visual Studio Code, Android Studio, and Xcode itself.
Getting Started
Let’s start on your Flutter iOS app development journey:
Step 1: Create a New Flutter Project
Open your terminal and navigate to the directory where you want to create your Flutter project. Run the following command to create a new project:
flutter create ios_app_exampleThis will set up the basic structure of your Flutter project.
Step 2: Configure iOS Settings
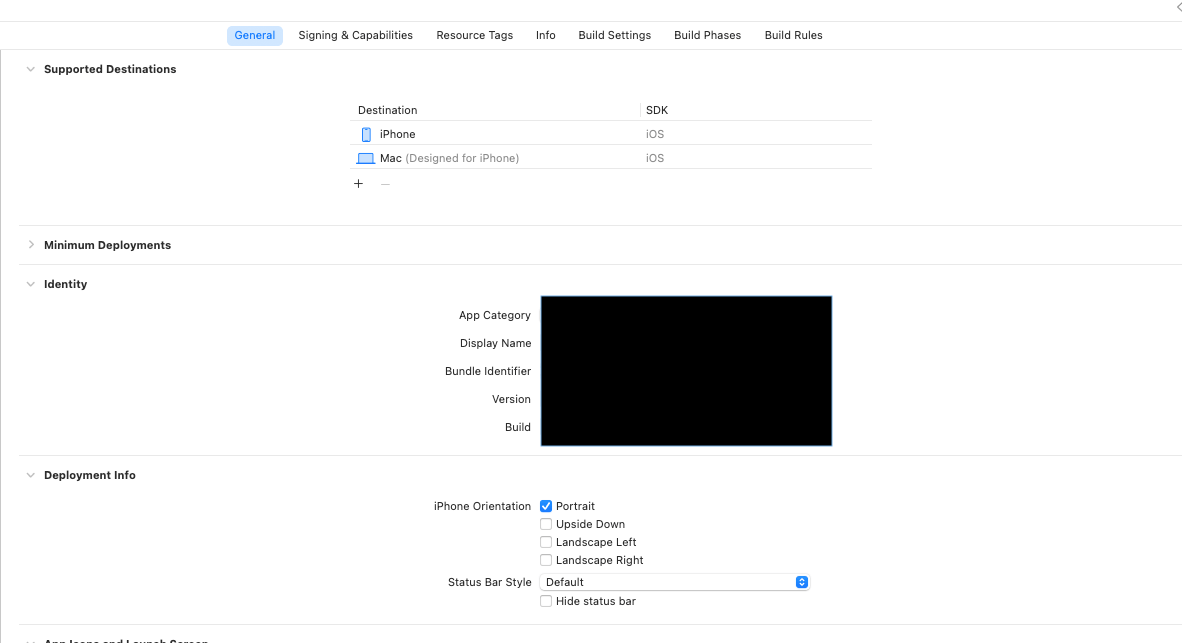
Navigate to the ios directory within your Flutter project and open the Runner.xcworkspace file using Xcode. Here, you can configure various settings for your iOS app, including its name, bundle identifier, and deployment target.

Step 3: Configure Apple Developer Account
you’ll need to set up provisioning profiles and certificates in Xcode. This step is crucial before moving forward with deployment. Go to Apple Developer Account. If you already have an Apple Developer account, then create bundle identifiers, certificates, and provisioning profiles; otherwise, you need to purchase an Apple Developer account for $99 per year.
Step 4: Configure Signing & Capabilities with Xcode
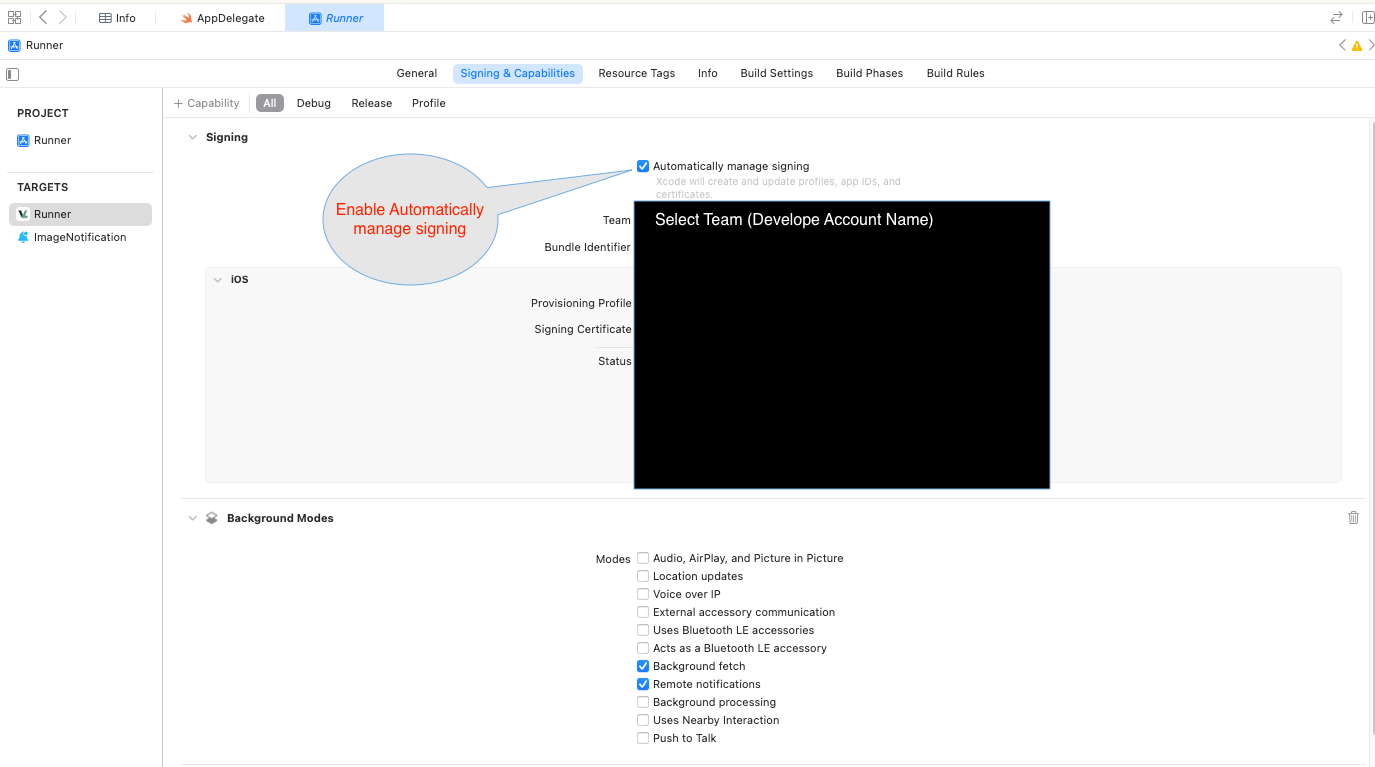
After generating bundle identifiers, certificates, and provisioning profiles, open Signing & Capabilities with Xcode. For that, select Runner under Targets from the left panel of the root directory for Runner. Now, add an Apple ID in Xcode by going to Xcode -> Settings -> Accounts.
After performing the upper steps, select the team from the Signing and Capabilities tabs and perform the below-image steps.

Step 5: Testing and Debugging
iOS simulator provided by Xcode to test your app’s functionality on various iOS devices.
Step 6: Optimization and Deployment
Flutter provides tools to help you achieve smooth animations and fast load times. When your app is ready for deployment, follow the Flutter documentation to package and submit your app to the App Store.
Step 7: Submit your app to the App Store
First of all, create an app in the Apple developer account with the same bundle identifiers. Make sure your app version number is the same in both Xcode and the app, which is created in the Apple developer account. Now, select Any iOS device or your already-plugged-in iOS device with Xcode. Consider the below image.

Select Product > Archive. Now the process will start for building iOS apps with Flutter. Once the archive process is complete, you need to see the window for extracting IPA and submit the app to the App Store. You may proceed further by clicking Next and submitting to the App Store. Let me know on my email if you stuck with the process for building and uploading an app on the App Store.
Conclusion
Creating an iOS app using Flutter is like unlocking the opportunities for developers. You can make apps that work smoothly on both iPhones and Android devices. The best part? You only need to write code once and Flutter makes the whole process really smooth and fast. So, by using this helpful guide you have just started your journey into the thrilling world of making iOS apps with Flutter. Get ready for some exciting coding adventures!
Frequently Asked Questions (FAQ)
Can we build iOS app with Flutter?
Absolutely, yes! You can create stunning and performant iOS applications that look and feel like they were built using native tools.
How do you make an iOS build in Flutter?
To make an iOS build in Flutter, you need to follow these steps:
1. Setup Your Flutter Project
2. Navigate to the iOS Directory
3. Install Dependencies
4. Open the Project in Xcode
5. Configure Xcode Settings
6. Select a Device or Simulator
7. Build and Run the App
8. Testing and Debugging
9. Optimization and Deployment
Can I develop iOS app on Linux using Flutter?
Yes, you can develop iOS apps using Flutter on Linux. Flutter allows you to write the code for iOS and Android apps from a single codebase. However, building and testing the iOS app on a physical iOS device or simulator requires Xcode, which is available only on macOS.
Is Flutter good for iOS Dev?
Yes, Flutter is a very good option for iOS app development. The below several benefits that make it an attractive choice for iOS development:
1. Single Codebase for Multiple Platforms
2. Native-Like Performance
3. Expressive UI
4. Hot Reload
5. Fast Development
6. Consistent UI
7. UI Testing
Can I run Flutter without Xcode?
Yes, you can develop and run Flutter apps without Xcode but there are some limitations, especially when it comes to iOS development and testing.

I’m a Flutter and iOS developer, entrepreneur, and owner of fluttertutorialhub.com. I live in India, and I love to write tutorials and tips that can help other developers. I am a big fan of Flutter, FlutterFlow, iOS, Android, mobile application development, and dart programming languages from the early stages. I believe in hard work and consistency.

